Deactivate Your Facebook Account

How to deactivate your Facebook account:

 If you have two Facebook accounts and want to delete one of them, you have to first deactivate the account you want to delete before deleting it permanently.

Follow the below simple steps to deactivate your Facebook account

Step 1 : Log in to Facebook page

Step 2 : Click on Account menu(gear button) and Click on Settings

Step 3 : Click on Security

Step 4 : Click on "Deactivate your account" at the bottom and click on "confirm". Then, it will ask for your account password to confirm.

Step 5 : Enter your Facebook Password and Click on Deactivate Now button.

Change Your Email Address on Facebook

How to Change Your Primary Email Address on Facebook:

At any time, we can change the primary email address on our Facebook account. We can add many email addresses to our Facebook account and make one of them primary. All Facebook notifications are sent to the primary email address

Follow  below steps to Change Primary Email Address on Facebook

Step 1 : Log in to your Facebook account

Step 2 : Click on Settings

Step 3 : Click on Edit email setting and Click on Add another email

Step 4 : Enter new email and give Passwords and Click on Save changes

Step 5 : Go to your email account and Click on Confirmation email sent by Facebook

Go to Facebook and choose the newly added email address as primary in Facebook, and click on "Save Changes.

Delete Your Google+ Account

How to Delete Your Google+ Account:

We can delete our entire Google+ account.It is easy to delete account and we cab restore account after deleting.

Follow below steps to delete your Google+ account

Step 1 : Logged into the Google+ account

Step 2 : Click on Gear icon and click on Google+ settings

Step 3 : Click on Google+

Step 4 : Click on Delete profile and remove associated Google+ features

and select  delete your entire Google profile option

Step 5 : We can delete our entire Google+ account. It is easy to delete the account, and we can restore the account after deleting.

Delete Your Google+ Profile

How to delete your Google+ profile:

If you don't like your Google+ profile, you can delete it easily.

Follow below steps to delete Google+ Profile

Step 1 : logged into the Google+ account

Step 2 : click on Gear icon and click on Google+ settings

Step 3 : click on Google+

Step 4 : click on Delete profile and remove associated Google+ features

and select Delete Google+ content option

and confirm deletion 

Step 5 : Click on the "Remove selected services" button to delete your Google+ profile. Then, it will redirect you to a feedback page where you can provide feedback and click on submit.


Transfer Ownership of Your Google+ Page

How to Transfer Ownership of Your Google+ Page:

The page owner can transfer ownership of their Google+ page. Only the page owner can change ownership, not a manager. Before transferring ownership, you must first add a manager to the page. You can transfer ownership only to the page managers. After transferring ownership, the page owner becomes a manager, and the manager becomes the page owner.

Follow the below simple steps to transfer ownership of your Google+ page

Step 1 : Log in to your Google+ account

Step 2 : Click on Menu and select settings

Step 3 : Click on Managers

Step 4 : Click on Transfer ownership button on the right side      

Step 5 : Select manager and click on transfer and continue and confirm ownership to that manager.

Remove Managers From Your Google+ Page

How to remove managers from your Google+ page:

We can remove managers from our Google+ page if there is no use with that manager.Both owner and manager can remove managers from a Google+ page.

Follow below steps to remove managers from your Google+ page

Step 1 : Log in to your Google+ account

Step 2 : Navigate to your page

Step 3 : Click on menu and click on settings

Step 4 : Click on managers

Step 5 : Click on the "X" next to the manager's name to delete them from your Google+ page. Then confirm that you want to remove the manager from your page.

Add Managers to Your Google+ Page

How to add managers to your Google+ page:

After creating a Google+ page, we can add multiple people to manage the page. Both the page owner and manager can add managers to the Google+ page. We can add up to 50 managers to a page. The owner of the page can delete the page and change the ownership of the page. The page manager can change the account information and tagline as well.

Follow below steps to add managers to your Google+ page

Step 1 : Log in to your Google+ account

Step 2 : Go to your page

Step 3 : click on menu and click on settings

Step 4 : click on managers

Step 5 : Enter the email address of the person you want to add as a manager to your Google+ page.

An invitation email will be sent to the manager. After the manager accepts the invitation, an acceptance email will be sent to the owner.

Remove Blogger Navbar From your Blog

Blogger Navbar : 
The Blogger Navbar is a navigation bar that appears at the top of a Blogger blog. By default, all Blogger blogs have the Navbar included, as it is part of the Blogger templates. The Navbar contains some features for quick navigation.

If you want to change or remove the Blogger Navbar from your blog, this post can help you, especially if you are a beginner.

How To Remove/Turn Off Blogger Navbar From Blogger Blog:

It is easy to disable or remove the Blogger navbar from your Blogger blog. You can do this by going to the Blogger Layout and clicking on the edit button for the navbar. From there, you can configure the navbar according to your preferences, including disabling or removing it altogether.

Follow below steps to remove/disable Blogger navbar from your Blogger blog

Step 1 : Go to Blogger Dashboard

Step 2 : Click on Layout

Step 3 : Click on 'Edit' corresponding to Navbar.

Step 4 : Select the "Off" option in the Navbar configuration window located at the bottom.

Step 5 : Click on Save

That's it! The Blogger navbar has been successfully removed from your blog. If you want to bring it back at any time, simply select one of the navbar options.

Disabling or turning off the navbar from your Blogger blog is a good idea if you don't need it. However, after removing the Blogger navbar, a large empty space is left above your Blogger header or blog title. It is better to remove that unwanted space above the Blogger header.

We can also hide Blogger navbar temporarily by adding custom css code to Blogger.

How to hide Blogger navbar :
  • Go to Blogger Dashboard
  • Click on Template and click on Customise
  • Click on Advance
  • Click on Add CSS and add below code
                    #navbar-iframe{
                    display: none !important;
                                               }
  • Click on Apply to blog

Backup Your Widgets in Blogger

How To Backup Your Widgets in Blogger Blog:

Suppose we make changes to the widget code and encounter an error after applying the changes, it can't be undone without having a backup. Therefore, it is better to backup your widgets before customizing them in a blogger blog. It is easy to backup widgets in your blogger blog. There are different methods to backup widgets/gadgets in blogger blogs, such as copying the code from the template or editing the widget on the blogger layout and copying that widget code.

Follow below steps to backup JavaScript/HTML widgets in your Blogger blog

Step 1 : Go to Blogger Dashboard

Step 2 : Click on Layout

Step 3 : Click on Edit corresponding to widget

Step 4 : Copy that widget code

Step 5 : Paste in notepad and Save.

If you encounter any errors after customizing widgets in your Blogger blog, you can simply restore the widget by pasting the backup JavaScript/HTML code into the widget box and clicking on save.

Backup Blogger widgets on Your Blog : 

We can get the blogger widget code by click on edit button corresponding to blogger widget on your blogger dashboard. To get back of the blogger widget you have to get the source of your blog.

Follow below steps to backup your blogger widgets in your blogger blog :

Step 1 : Open your blogger blog through Firefox browser.

Step 2 : Copy source code of your blog

Step 3 : Paste in that source code in notepad

Step 4 : Find widget code from that source code .
Copy widget codes starting from <div class='widget-content'> and finish with </div>

Step 5 : Save those widget codes for backup .

This is the easiest method to backup your widgets in your blogger blog.

Remove Subscribe to Posts (atom) From Blogger

Subscribe to posts (atom) : 
"Subscribe to posts (atom)" is a subscription link that can be useful for your blog visitors to subscribe to your blog posts' atom feeds. By default, the "Subscribe to: Posts (atom)" link will appear below your Blogger blog posts. This link will appear just below all your blog posts. However, if you don't want this link to appear on your Blogger blog, you can hide or delete it.

It is better to remove/hide the "Subscribe to: Posts (atom)" link and add a customizable "Subscribe to Blog" widget to your Blogger blog. Nowadays, many people are switching to RSS feeds. To switch to RSS feeds, first, hide or remove the default "Subscribe to: Posts (atom)" link from your Blogger blog and add RSS feeds to your Blogger.

How To Remove Subscribe to Posts (atom) Link from Blogger Blog:

We can hide or permanently delete the "subscribe to posts (atom)" link on your Blogger blog in two ways. The first method is to delete the "subscribe to posts (atom)" link code from your Blogger template, and the second method is to add custom CSS code to hide the "subscribe to posts (atom)" link on your blog.

Follow below steps to remove Subscribe to Posts (atom) link from your Blogger

Step 1 : Go to Blogger Dashboard

Step 2 : Click on Template

Step 3 : Click on Edit HTML and tick expand widget template box

Step 4 : Search below code

<b:include name='feedLinks'/>

and delete above line

Step 5 : Click on Save template.

Now, the 'subscribe to posts (atom)' link is no longer visible on your Blogger blog. You can also hide the "Subscribe to Posts (Atom)" link by adding a simple CSS code to your Blogger template.

Follow below steps to hide "Subscribe to posts (atom)" link in Blogger : 

Step 1 : Go to Blogger Dashboard

Step 2 : Click on Template and Click on Customise button

Step3 :  Click on Advanced tab

Step 4 : Click on Add CSS tab

          Add below code in the Add CSS code box

            .feed-links {
            display:none !important;
            }

Step 5 : Click on Apply to blog.

Now, the 'Subscribe to Posts (Atom)' link will not appear on your Blogger. You can use any method to remove/hide the 'Subscribe to Posts (Atom)' link on your Blogger.

How to Enable Login Notifications on Facebook

Enable log in notifications on Facebook:

We can provide more security to our Facebook account by enabling login notifications in Facebook. If someone tries to log in to your Facebook account, you can get a message code on your mobile.

Follow the below simple steps to enable log in notifications on Facebook

Step 1 : Log in to your Facebook account

Step 2 : Click on account settings

Step 3 : Click on security tab and click on edit Login Notifications setting

Step 4 : Check email and text message/push notification boxes on login notifications

After selecting the "text message" option, Facebook will ask for your password and then your phone number. You should select your country and enter your mobile number and then click on "Continue". Once you have clicked on "Continue", you will receive a code on your mobile phone. You need to enter this code in the box on Facebook and then click on "Continue".

Step 5 : Click on Save changes.

Now, you will receive login notifications for your Facebook account on both your email and mobile number.

Delete All Facebook Messages With One Click

How to Delete All Facebook Messages With One Click:

To delete all Facebook messages with one click, you can use a Google Chrome extension called "Facebook Fast Delete Messages." This extension allows you to delete all your Facebook messages at once, which can save you a lot of time if you have a lot of messages to delete.

Follow below steps to delete all Facebook messages with one click

Step 1 : Go to Google chrome

Step 2 : Search for "Facebook Fast Delete Messages" and click on "Add to Chrome" to install the extension.

Step 3 : Once the extension is installed, go to Facebook and open the Messages section.

Step 4 : Click on the extension icon (a trash can) in the top right corner of your browser window.

Step 5 : Click on "Delete All Messages" to delete all your Facebook messages at once.

Note that this will delete all your messages permanently and cannot be undone, so make sure you have a backup of any important messages before using this extension.

Turn Off Comment Notification Email On Blogger

How to Turn Off Comment Notification Email on Blogger Blog.

We can receive comment notifications to our email when a visitor leaves a comment on our Blogger blog. However, if we do not want to receive these notifications, we can turn off comment notification emails.

Follow below steps to turn off comment notification emails on Blogger blog

Step 1 : Go to Blogger dashboard

Step 2 : Click on Settings

Step 3 : Click on Mobile and email under settings

Step 4 : On Comment Notification Email delete your email id

Step 5 : Click on save settings

Now you don't get any blogger blog comments on your email.

Remove Icon On Blogger Comments

How to remove icon on blogger comments:

By default, the favicon image will be shown on Blogger author comments. We can see the favicon image on Blogger comments next to the author's name. We can remove the icon on Blogger comments with simple changes to the author comment code in the template.

Follow the below simple steps to remove icon on blogger comments

Step 1 : Go to Blogger Dashboard

Step 2 : Click on Template

Step 3 : Click on Edit HTML and tick Expand Widget Templates box

Step 4 : Search for below code

<dt expr:class='&quot;comment-author &quot; + data:comment.authorClass' expr:id='data:comment.anchorName'>

replace above with below code

<dt expr:class='&quot;comment-author &quot;' expr:id='data:comment.anchorName'>

Step 5 : Click on Save Template.

If you want to show custom image next to comments in blogger, then enable Google+ comments on your blogger.

Add Wikipedia Search Box widget to Blogger

How to Add Wikipedia Search Box widget to Blogger:

Wikipedia is one of the top sites with a large database and free content. If you add a Wikipedia search box to your blog, your visitors can search for information related to your blog posts on Wikipedia. This can help them gain a deeper understanding of the topic. We can easily add a Wikipedia search box to Blogger using the Wikipedia gadget.

Follow the below steps to Add Wikipedia Search Box widget to Blogger

Step 1 : Go to Blogger dashboard

Step 2 : Click on Layout

Step 3 : Click on Add a Gadget

Step 4 : Click on more gadgets and look for Wikipedia search box widget and then add Wikipedia gadget. Just enter title name in Wikipedia gadget configuration window.

Step 5 : Click on Save .

Like this you can add Wikipedia search box to your blogger blog.

Add MP3 Files To Blogger Blog

How to add mp3 files to Blogger blog:

We can't directly add MP3 music files to a Blogger blog because we can't store MP3 files on the platform. Instead, we need to store the MP3 files on a different platform, such as Google Sites or any other hosting site. In this post, I'll explain how to add MP3 files to your Blogger blog using Google Sites.

Follow the below steps to add mp3 files to Blogger blog

Step 1 : Go to Sites.Google.com

Step 2 : Create account

Step 3 : Upload MP3 file to Google sites

Step 4 : Copy file storage location link on Google sites

Step 5 :  Open the Blogger post editor, switch to HTML mode, and add the MP3 file link to the post.

Like this, you can add MP3 files to your Blogger blog easily.

Add ZIP and RAR Files To Blogger Blog

How To Add ZIP and RAR Files To Blogger Blog:

It is difficult to add ZIP and RAR files directly to a Blogger blog, but we can add them using Google Sites.

Follow the below simple steps to add ZIP and RAR files to Blogger blogs.

Step 1 : Go to Sites.Google.com

Step 2 : Click on file cabinet and give any name

Step 3 : Go to create page and click on add file and add zip file

Step 4 : Right click on upload file and copy link address

Step 5 : Add this link to post in blogger with link tab in posts editor.

Put Text Links In Blogger Blog

Text Links :
There are two types of links: Text links and Image links. We can create text links in Blogger blog posts using an anchor tag or using the link button on the Blogger post editor. Text links can be used to create links to another web page. In this post, we are going to discuss putting text links on your Blogger blog.

How To Put Text Links In Blogger Blog :

Text links also known as hyperlinks. With the link button on your Blogger blog post editor, we can easily add links to your blog posts. Alternatively, you can also use the <a> tag to put links in your post.

Follow the below simple steps to put text links in Blogger blog post

Step 1 : Go to Blogger Dashboard

Step 2 : Open post you want to put text links.

Step 3 : Now select text you want to create link and click on Link button in posts editor tool bar.

Step 4 : Now Edit link configuration window will open , Now enter URL link in Web address box

Step 5 : Click on OK and Click on Update button to update changes.

Now, open your blog post and check the link. When you click on the link text, it will go to the page (link) that you added in the Web address box. This is how you can create text links on your blog post. If you want to add text links outside of your blog post, you can use the anchor tag to create links. Use the anchor tag like below:

 <a href="link address">Hyper text </a>

Remove Label Number count in blogger

How To Remove Label Number count in Blogger Blog :

Label count refers to the number of posts that belong to a particular label. We can see the label count on the right side of the label on Blogger blogs. Although label number counts are not necessary for blogs, we can easily delete them.

Follow the below simple steps to remove label number count in Blogger blogs

Step 1 : Go to Blogger Dashboard

Step 2 : Click on Layout

Step 3 : Click on Edit label widget

Step 4 : Un check the box " show number of posts per label".

Step 5 : Click on save.


Replace Blogger Profile With Google Plus Profile

Google+(plus) profile for Blogger:
Blogger and Google Plus are both Google products. Google is trying to integrate Blogger by replacing the Blogger profile with the Google Plus profile. You can easily share your blog content with your Google Plus friends by connecting with your Google Plus profile. To replace your default Blogger commenting with Google Plus commenting, you must switch to a Google Plus profile first.

With a Google Plus profile, your blog audience can also increase. Even after replacing your Blogger profile with a Google Plus profile, you can switch back to your Blogger profile at any time.

How To Replace Your Blogger Profile With Google Plus Profile:

It is easy to switch to a Google Plus profile from a Blogger profile. There are two simple methods to replace a Blogger profile with a Google Plus profile. Here, I'm mentioning these two methods, and you can choose the one that is easier for you.

Follow below steps to replace your Blogger profile with your Google(+) plus profile :

Step 1 : Go to Blogger Dashboard

Step 2 : Click on Gear icon at the top of Blogger Dashboard

Step 3 : Select Connect to Google plus.

That's it! Your Blogger profile is now successfully replaced with your Google+ profile. You can now change your Blogger's default commenting system to Google+ commenting. You can also add your Google+ profile to your Blogger blog by using the Google+ profile widget on your Blogger.

Another method to replace your blogger profile with your Google plus profile

Step 1 : Go to Blogger Dashboard

Step 2 : Go to WWW.blogger.com/switch-profile.g

Step 3 : Tick box and click on Switch now button

Now your Blogger profile has been replaced with your Google plus profile. You can now change your Blogger's default commenting system to Google+ commenting and add a Google+ profile widget to your blog. If you ever want to switch back to your old Blogger profile, you can do so at any time.

How to switch back to old Blogger profile from your Google plus profile : 


Step 1 : Go to Blogger Dashboard

Step 2 : Click on Gear icon at the top of Blogger Dashboard

Step 3 : Select Revert to Blogger profile. 

hide blog title and description from header on blogger

How to hide blog title and description from header on Blogger:
Hide blog title and description from Blogger header

We can delete or hide the blog title and description from the Blogger blog header. Without adding any CSS code, we can easily remove the blog title and description from the header.

Follow below steps to hide blog title and description from Blogger header 

Step 1 : Go to Blogger dashboard

Step 2 : Click on template

Step 3 : Click on edit template and tick expand widget templates box

Step 4 :
To Delete blog title
search for below code

.Header h1 {
  font: $(header.font);
  color: $(header.text.color);
  text-shadow: 0 0 $(title.shadow.spread) #000000;

 and add  display:none; just below above code to delete blog title. 

To Delete blog description
 search for below code

.Header .description {
  font: $(description.font);
  color: $(description.text.color);

 and add  display:none;  just below above code to delete blog description

 Step 5 : Click on Save template.

Enable Followers In Blogger

How to Enable Followers In Blogger blog :

To enable the Followers feature on your Blogger blog, you can use either the Followers gadget or the Google+ Followers gadget. After adding the Followers widget to your blog, you can see the list of followers. Additionally, you can also use the new Google+ Followers gadget to gain more followers for your blog.

Follow below steps to Enable Followers In Blogger

Step 1 : Go to Blogger dashboard

Step 2 : Click on layout

Step 3 : Click on Add a Gadget

Step 4 : Add followers gadget

Step 5 : Click on save.

Now, followers are enabled on your Blogger blog, and you can see your blog's followers on it.

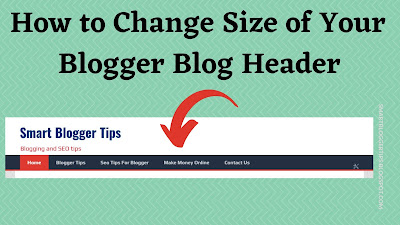
Change Header Size In Blogger

How to change header size in Blogger blog:

We can increase or decrease the header size in a Blogger blog. It is easy to adjust the size of your blog header in Blogger.
How to Change Blogger Header Size


Follow below steps to change header size in Blogger blog

Step 1 : Go to Blogger dashboard

Step 2 : Click on Template

Step 3 : Click on Edit HTML and tick expand widget templates

Step 4 : Find below code

/* Header
----------------------------------------------- */
.header-left{
display: inline-block;
height: 30px;
width: 300px;
float: left;
}
.header-right {
display:inline-block;
float:right;
}

Change the height and width pixel value to resize the Blogger header. If you want to increase the Blogger header size, increase the pixel value, and to decrease the Blogger header size, decrease the pixel value.

Step 5 : Click on Save Template

Display Labels Of Your Posts In Blogger

Category widget is not available in Blogger to categorize posts in a Blogger blog. Labels are used to categorize blog posts in Blogger. In this post, I'm going to show you how to add a Labels widget to your Blogger blog and how to add labels to posts.

How To Display Labels Of Your Posts In Blogger Blog :

To enable labels on your Blogger blog, you first need to add the Labels gadget/widget. After adding the Labels widget to your Blogger, you can add label names to your blog posts. By default, labels will not appear on your Blogger blog. To make them appear, you need to add the Labels widget.

Follow below steps to display labels of your posts in Blogger

Step 1 : Go to Blogger Dashboard

Step 2 : Click on Layout

Step 3 : Click on add a gadget and add Labels gadget

Step 4 : Go to posts, click on edit posts and click on Labels right side to post editor just below Post settings

Step 5 : Give label name and click on Done.

Add a Widget/Gadget on right side of blogger header

How to Add Widget/Gadget on right side of Blogger header :

Suppose you want to add a banner or search box to the right side of your Blogger header. This post will help you achieve that. To add a banner or search box to the right side of the Blogger header, we need to add an extra gadget on the right side of the Blogger header.

Follow below steps to add Widget/Gadget on right side of Blogger header

Step 1 : Go to Blogger Dashboard

Step 2 : Click on Template

Step 3 : Click on Edit HTML and tick expand widget templates

Step 4 : Find below lines in your template code
<b:section class='header' id='header' maxwidgets='1' showaddelement='no'>
<b:widget id='Header1' locked='true' title='seo (Header)' type='Header'/>
replace with below 2 lines

<b:section class='header' id='header' maxwidgets='2' showaddelement='yes'>
<b:widget id='Header1' locked='false' title='your blog title (Header)' type='Header'/>

and paste below lines after above to lines


<b:section id='header-right' showaddelement='yes'/>
<div style='clear: both;'/>

and the search for  ]]></b:skin> and paste below code above it

#header, body#layout #header {
width:45%;
display:inline-block;
float:left;
}
#header-right, body#layout #header-right {width:30%;display:inline-block;float:right;padding:15px;}
#header-right .widget {margin:0;}
Step 5 : Click on Save template

Now, go to your Blogger layout and add a new gadget to the header section. This gadget will appear on the right side of your Blogger blog header.

Add Widget/Gadget Inside Blogger Blog Header

How to Add Widget/Gadget Inside Blogger Blog Header :

By default, the Blogger blog header widget is locked and it is not possible to add a widget inside the Blogger blog header. However, it is possible to add an extra widget inside the Blogger header by changing some settings. To do this, we need to set "yes" on "showaddelement" in the header section and unlock the header widget.

Follow below steps to add widget/gadget inside Blogger blog header

Step 1 : Go to Blogger Dashboard

Step 2 : Click on Template

Step 3 : Click on Edit Html and tick expand widget templates

Step 4 : Find below line in template code

<b:section class='header' id='header' maxwidgets='1' showaddelement='no'>

and chanage showaddelement='no' to 'yes' and increase maxwidgets='2'
i.e <b:section class='header' id='header' maxwidgets='2' showaddelement='yes'>


Now the gadget has been added inside the Blogger header, but it cannot be moved anywhere because it's locked. Therefore, we need to unlock the header widget to change the widget position.

see below code in template, it will appear after above code

<b:widget id='Header1' locked='true' title='your blog title (Header)' type='Header'>

replace above code with below code

<b:widget id='Header1' locked='false' title='your blog title (Header)' type='Header'>
 
Step 5 : click on Save template

Now, click on "Layout". You should now see the extra widget added to your Blogger blog header.

Advantages of Blogger Dynamic Views

Blogger introduced Dynamic Views for Blogger blogs. Before enabling Dynamic Views for your Blogger blog, it is important to know the advantages and disadvantages of Dynamic Views. In this post, we will explain the advantages of Blogger Dynamic Views, and later we will discuss the disadvantages of Dynamic Views.

What are the Advantages of Blogger Dynamic Views :

Fast loading: Dynamic Views use AJAX technology to load the content of your blog, which makes it faster and smoother compared to traditional Blogger templates.

Reader-friendly: Dynamic Views offer a clean and modern layout that allows your readers to easily navigate through your blog posts.

Compatibility: Dynamic Views are compatible with all major browsers, including Chrome, Firefox, Safari, and Internet Explorer.

Mobile-responsive: Dynamic Views are designed to be mobile-friendly, which means your blog will look great on any device, including smartphones and tablets.

SEO-friendly: Dynamic Views are optimized for search engines, which means your blog posts will be more visible to search engines like Google.

Single click access: With a single click, your readers can access all of your blog posts, making it easier for them to find the content they are looking for.

Automatic updates: Dynamic Views automatically update your blog with the latest features and improvements, so you don't have to worry about manually updating your blog.

Disadvantages Of Blogger Dynamic Views

  Blogger now offers dynamic views for your blog. Before configuring dynamic views, it is better to know the advantages and disadvantages of using them.

What are the Disadvantages Of Blogger Dynamic View:

  • Widgets cannot be added in dynamic views.
  • Adding AdSense in dynamic views can be difficult.
  • Jump Break doesn't work in dynamic views.
  • Menus, labels, and categories cannot be added in dynamic views.
  • Layouts such as body and footer layouts are not available in dynamic views.

Add header image to Blogger Dynamic Views

How to add header image to Blogger Dynamic Views :

This post will help you add a header image to Blogger dynamic views. In Blogger dynamic views, there is no header widget to add a header image to blogs. Therefore, to add a header image to dynamic views, we need to add CSS code to the Blogger blog.

Follow below steps to add header image to Blogger dynamic views

Step 1 : Go to Blogger Dashboard

Step 2 : Click on Template

Step 3 : Click on Customise

Step 4 : Click on Advanced tab and then Click on add CSS tab
              next paste below code in custom CSS box

               .header-bar{background:url('http://image url.com') !important;}

Step 5 : Click on Apply to blog

Go to your blog and check blog Header image.

Enable Blogger Dynamic Views

How to enable Blogger Dynamic Views :

Dynamic Views can help increase your page views as it is compatible with all major browsers. However, it is important to note that the increased functionality may result in a slower loading time for your blog.

Follow below steps to enable Blogger Dynamic Views

Step 1 : Go to Blogger Dashboard

Step 2 : Click on Template

Step 3 : Under dynamic views you can see seven different views

Step 4 : Place the cursor on any template, and you will see "Apply to Blog" corresponding to that template.

Step 5 : Click on Apply to blog.

Now your blog is configured with dynamic views. Before enabling Blogger dynamic views, It is better to know the advantages and disadvantages of dynamic views.

Change Width/Height Of Popular Post Thumbnails In Blogger

How To Change Width and Height Of Popular Post Thumbnails In Blogger:

Change Width and Height of Popular Post Thumbnails In Blogger
  It is easy to adjust the size of popular post thumbnails in Blogger blogs. By increasing the size of these thumbnails, visitors can more easily access popular posts on your blog. Therefore, it is recommended to increase the size of popular post thumbnails in your Blogger blog.

Follow Below Steps to Change Width/Height Of Popular Post Thumbnails In Blogger

Step 1 : Go to Blogger Dashboard

Step 2 : Click on Templates

Step 3 : Click on Edit Html and tick expand widget templates

Step 4 : Search for " height='data:thumbnailSize' " and change this line as follows:

height='100' or increase value more than 100

and again search for " width='data:thumbnailSize' "  and change this line as follows:

width='100' or increase the value to more than 100.

Step 5 : Click on Save template.